Hey everyone! Today I'm going to walk you through the "correct" way to import resources in WordPress for sites using Oxygen. Normally we would enqueue our resources in the functions.php file of our theme. As you likely know, Oxygen completely disables the normal WordPress theme system, so we need to be a little more creative. The solution is to create your own very basic plugin that just enqueues your resource files. This is very simple to do and I'll give you all the code and examples you need to get the job done!
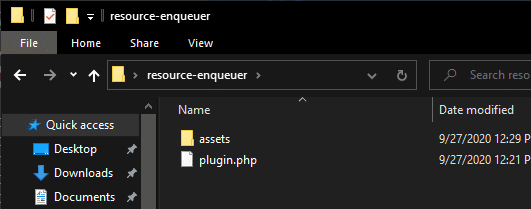
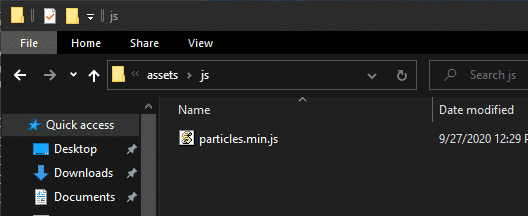
First things first, let's create the files and directory structure that we'll need. Create a folder on your desktop (or wherever you prefer) and name it something like "resource-enqueuer". Inside that folder, create a file called "plugin.php" and another folder called "assets". Inside the assets folder, I recommend creating some more sub-directories like "css", "js", etc. depending on what kind of resources you are working with. It's not totally necessary if you only have a few files, but it's best practice to keep things organized.

Simply place the JS and CSS files you need in their respective directories in the plugin folder.

Alrighty, if you've never coded anything before this will be the trickiest part, but trust me it's very simple! I'm going to lay everything out as simply as possible. First, copy and paste the code below into your new plugin.php.
<?php
/*
Plugin Name:	Resource Enqueuer
Description:	Enqueues Resource Files
*/

//You can ignore this, but don't forget to include it.
//It helps prevent people from directly executing your code.
if ( ! defined( 'WPINC' ) ) {
	die;
}

add_action( 'wp_enqueue_scripts', 'resource_enqueuer' );

function resource_enqueuer() {

	//Put your CSS enqueues under here


	//Put your JS enqueues under here


}Next, we're going to add our enqueues to the plugin.php file. This is where you're going to need to pay attention a little more, as everyone's case is slightly different and you need to insert the correct names of your files. Below I've written out a few examples of what your enqueue calls should look like for CSS / JS files and if you have your files locally saved or on a CDN.
//CSS enqueue from directory
wp_enqueue_style( 'YourCssSheetName', plugin_dir_url( __FILE__ ) . 'assets/css/yourfilename.css' );

//CSS enqueue from CDN link
wp_enqueue_style( 'YourCssSheetName', 'https://yourcdnlink.com/yourfile.css' );

//JS enqueue from directory
wp_enqueue_script( 'YourJsScriptName', plugin_dir_url( __FILE__ ) . 'assets/js/yourfilename.js', '', '', true );

//JS enqueue from CDN link
wp_enqueue_script( 'YourJsScriptName', 'https://yourcdnlink.com/yourfile.css', '', '', true );
Additionally, you might want to enqueue some resources only on specific pages. Below I've provided some examples of some conditional statements to help you do that! Simply place your enqueues inside the necessary conditionals to make your resources load only on the pages you need them on. There are MANY more conditionals available in WordPress and I've only listed some of the most common scenarios. If you'd like to learn more or have a different use-case, check out this link.
//On the front page ONLY
if ( is_front_page() ){

	//insert enqueues here

}

//On every page EXCEPT the front page
if ( ! is_front_page() ) {

	//insert enqueues here

}

//On specified page (based on slug or ID)
if ( is_page('your-page-slug-or-id') ){

	//insert enqueues here

}

//On several specified pages (based on slugs or IDs)
if ( is_page( array('first-slug', 'second-slug', 'etc...') ) ){

	//insert enqueues here

}

//On all posts of a specified type
if ( get_post_type() == 'yourposttype' ){

	//insert enqueues here

}
Don't forget to save your file!
Here's an example of what a simple completed plugin.php might look like (note: you can add additional enqueues easily any time and I'll talk about that more later)
<?php
/*
Plugin Name:	Resource Enqueuer
Description:	Enqueues Resource Files
*/

//You can ignore this, but don't forget to include it.
//It helps keep your plugin safe from being tampered with!
if ( ! defined( 'WPINC' ) ) {
	die;
}

add_action( 'wp_enqueue_scripts', 'resource_enqueuer' );

function resource_enqueuer() {

	//Put your CSS enqueues under here

	//Enqueues morphtext.css everywhere
	wp_enqueue_style( 'morphtext', 'https://cdnjs.cloudflare.com/ajax/libs/Morphext/2.4.4/morphext.css' );


	//Put your JS enqueues under here

	//Enqueues particles.js on the front page only
	if (is_front_page()){
		wp_enqueue_script( 'particlesjs', 'https://cdn.jsdelivr.net/npm/particles.js@2.0.0/particles.min.js', '', '', true );
	}

	//Enqueues morphtext.js everywhere
	wp_enqueue_script( 'morphtextjs', 'https://cdnjs.cloudflare.com/ajax/libs/Morphext/2.4.4/morphext.min.js', '', '', true );

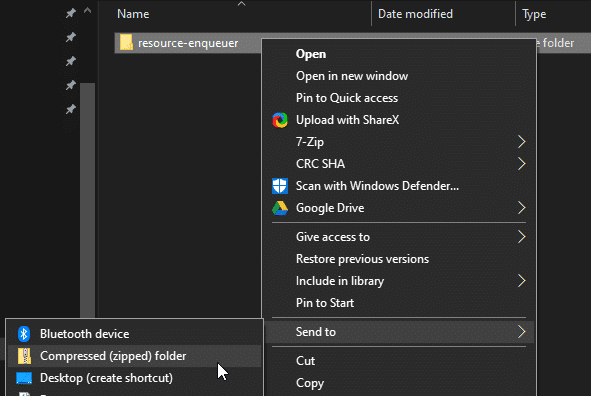
}We're finally ready to see some results! Next, go ahead and right-click on your plugin folder and select Send to > Compressed (zipped) folder.

Now we just need to upload and activate the plugin like we would any other plugin! Go to Plugins > Add New > Upload Plugin then select and upload your new zip file. Once that's done, activate the plugin.
We're done! Congrats! You've created your very own plugin to enqueue your resource files (and maybe your first plugin in general)!
You can easily add additional enqueues any time by editing the files for your plugin on the server. If you need help with that just follow the steps below!
First, we need to connect to our server with FTP / SFTP. If for some reason you're unable to do that or you aren't familiar with how to use those, you can use the plugin WP File Manager to do so, but please deactivate and delete it after you're done using it for security purposes. Once you're successfully browsing your server you should be able to find the plugin at /public_html/wp-content/plugins/your-plugin-name. From there, simply add the resources to the assets folder and edit your plugins.php file with the new enqueues you'd like to add.
Thank you SOOOO much, this is fantastic. I was so confused about all this. So far, I have been using the 'add stylesheet' within Oxygen, or 'add Code block'. Am I correct in my thinking now, that this method is only good for a few lines of code but not for a big site with tons of CSS and JS. Better to use your plugin method instead?
Thanks again.
Hi Uma, you're welcome! I'm glad you found this useful! And you are correct. For a small site you can probably get away with doing it that way, but it is always better to enqueue your files this way as you have more control over them and can keep all of your resource loading code in one place.
thank you for your prompt reply.
You have a great way of explaining things in a nice simple manner and easy to understand.
Hello,
I have created the folders and subfolders and plugin.php using VSCode. I'm trying to use gsap with Oxygen builder by linking to gsap via cdn. But where I'm stuck now is, in step 2 in Add Resources to Your Directories, what resources will I place from the gsap folders as there are many .js files there and no css files or img files from the gsap zip I downloaded from https://greensock.com/docs/v3/Installation.
Kindly guide me through.
Thank you for making this guide.
One quick note you might not be aware of. If you are loading the files from a CDN (for example), the code won't render while inside of the Oxygen Builder. It will render on the front end though. So in this case, you might be better served by adding an Oxygen codeblock where you need the functionality, and link to the CDN files there, rather than try to bring them in to every page on your site.